Move blocks forwards so that they are in front of other blocks by clicking the ‘Bring to Front‘![]() button.
button.
Move blocks backwards so that they are behind other blocks by clicking the ‘Send to Back’ ![]() button.
button.
For example: Your diagram has a number of related analog inputs. (Inputs could be related if they are all from the same floor; or, if they all show information from the same air handler.) You want to save space on your Catalyst page, and to show a relationship between these inputs. To accomplish both intentions, you decide to create an overlapped group of inputs.
To begin, you click and drag the inputs to their new location. You align the inputs using the ‘Align Lefts’ ![]() button. You then select all the inputs and use the ‘Decrease Vertical Space Between’
button. You then select all the inputs and use the ‘Decrease Vertical Space Between’ ![]() button to overlap the inputs.
button to overlap the inputs.
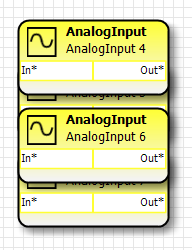
You have now created a group of overlapping analog inputs. However, some inputs are hidden behind other inputs.
![]()
You want to arrange the inputs so that you can view the Index number of each. The input nearest the top edge of the screen will be the input that is closest to the back, or, in other words, that is behind all the others.
Select the input closest to the top edge of your screen.
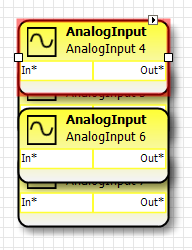
On the toolbar, click ‘Send to Back' ![]() . The group of inputs will appear as shown below.
. The group of inputs will appear as shown below.
![]()
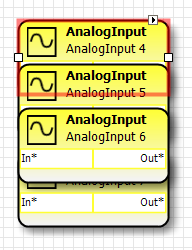
Similarly select the input nearest the bottom edge of your screen.
Click ‘Bring to Front’![]() . The inputs will now be arranged as shown below.
. The inputs will now be arranged as shown below.
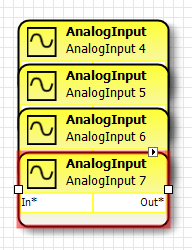
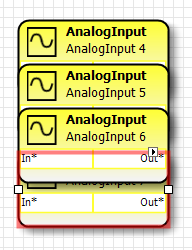
Your analog input graphic is complete. By using Bring to Front and Send to Back, you have saved space on the page, and indicated a relationship between the programming blocks.